Electric Steam Sterilizer + Dryer
Set it and forget it. The drying function is the real hygiene hero.
Boiling, steaming, or chemical tabs? We break down the safest sterilization methods for different bottle materials to prevent warping and chemical leaching.
By Renee, R3 Founder
Evidence-based product analysis since 2024
Updated June 2026
When you shop through retailer links on our site, we may earn affiliate commissions. R3 takes no money from brands and scores every product the same way. Learn more.
Get the research before you buy
The picks that cleared safety, what to skip, and why. No spam, no sponsors.
The quick answer
For glass bottles, boiling for 5 minutes is simple and effective. For plastic (even BPA-free) and silicone parts, active steam sterilization (electric or microwave bag) is safer than boiling, as it prevents direct contact with the hot metal pot which can warp plastic and increase chemical shedding. UV sterilizers are excellent for all materials but pricier.
Editor's note. Sterilization guidelines aligned with CDC recommendations for infants under 3 months or those with compromised immunity.
Sterilization does not clean. Whether you plan a 5-minute boil or a 5-10 minute steam cycle, you must wash bottles with hot soapy water and a bottle brush first to remove all milk residue. Sterilizing dirty bottles just bakes the milk proteins onto the plastic.
Washing with hot soapy water and a bottle brush must come before any sterilization method, because sterilizing a dirty bottle just bakes milk proteins onto the plastic.
Boiling suits glass bottles only, and a full rolling boil of 5 minutes is the target. 1. Place disassembled glass parts in a large pot. 2. Cover with water. 3. Bring to boil and keep rolling for 5 minutes. 4. Remove with tongs. Warning: Do not boil plastic nipples or collars directly on the bottom of the pot; they can melt.
A rolling boil of 5 minutes sterilizes disassembled glass bottle parts, but plastic nipples and collars can melt against the bottom of the pot.
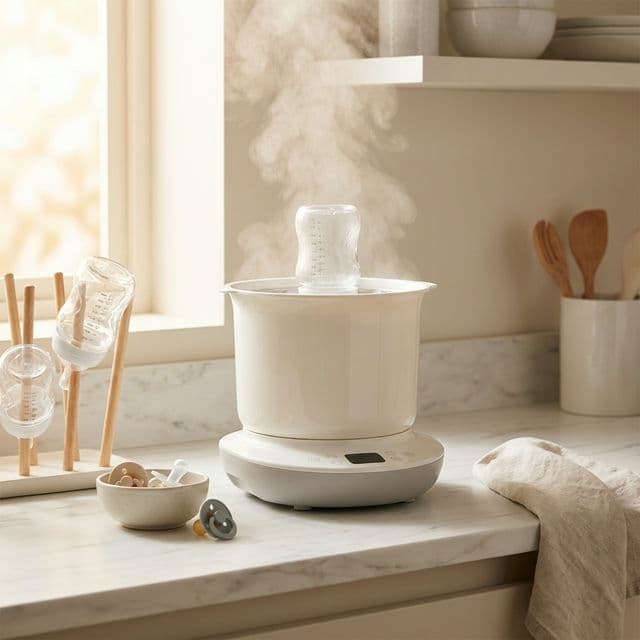
Electric steam sterilizers reach higher temperatures than boiling water (212°F+) and penetrate crevices better, with a typical cycle of 5-10 minutes per the manufacturer's instructions. They also dry the bottles, which prevents bacterial regrowth in stagnant water droplets. This is the best method for daily use.
Electric steam sterilizers reach 212°F or higher in a typical 5-10 minute cycle, and their drying function prevents bacterial regrowth in stagnant water droplets.
1 more tips
Create a free account to see more buying advice
We score every product the same way and send the picks that cleared safety, what to skip, and why. No spam, no sponsors.
Cited research
Common questions about baby care, answered by our research team.
Pre-washing baby bottles starts with disassembling all bottle parts including nipples, caps, and rings, then rinsing under running warm or cold water. Wash thoroughly with hot soapy water using a bottle brush to remove milk residue, grease, and dirt, especially squeezing soapy water through teat holes. Use mild, fragrance-free dish soap to avoid irritating baby's sensitive system. Rinse well multiple times.[1][2][3][5]
The boiling method for baby bottles uses a large pot with enough water to submerge all disassembled, pre-washed bottle parts. Bring to a full rolling boil and boil for at least 5 minutes. Use clean tongs to remove items and place on a clean dry towel or rack to air dry. Suitable for glass bottles; check plastic for heat tolerance as it may warp.[1][2][4]
Steam sterilization of baby bottles works by loading pre-washed, disassembled bottle parts into a steam sterilizer, ensuring steam can circulate freely. Add required water to the reservoir, close the lid, and run the cycle per manufacturer instructions, typically 5-10 minutes. Steam uses high temperatures to kill bacteria effectively on mixed materials like plastic and glass.[1][4]
Sterilizing baby bottles after every use is unnecessary for healthy full-term babies, though thorough cleaning with hot soapy water and a brush after every use is essential to remove residue and most germs. Sterilization is recommended for newborns, preemies, or in areas with poor water quality. Dishwasher sanitizing cycles can suffice if available.[2][3][4]
Mild, fragrance-free dish soap is the safe choice for washing baby bottles, preventing residue that could harm baby's sensitive digestive system. Avoid harsh detergents or scented soaps. Hot soapy water with a dedicated bottle brush effectively removes milk fats and dirt before rinsing and sterilizing.[1][2][5]
A dishwasher can clean and sanitize dishwasher-safe baby bottles: separate parts, place on top rack or in a closed mesh basket for small items, and run with hot water and heated drying or sanitizing cycle. This kills most germs effectively. Always pre-rinse and clean the brush and basin too.[3][4]
Chemical sterilization of baby bottles involves soaking pre-washed parts in a solution of sterilizing tablets or liquid (e.g., 2 tsp unscented bleach per gallon water for 2 minutes). Pros include convenience for travel, no equipment needed, and sterility maintained up to 24 hours. Rinse thoroughly with cooled boiled water after.[1][3]
Microwave sterilizers for baby bottles work by heating pre-washed parts in a microwave-safe bag/container with water on high for 3-8 minutes per instructions; cool before handling. UV: Arrange parts in device, run 5-10 minute cycle using ultraviolet light to kill bacteria without chemicals. Both are quick for mixed materials.[1][4]